It would seem my DIY skills are not all that flash as my DIY 477MHz Yagi is resonant on 1.36GHz........ Looks like it is destined for the bin!
On a more positive note the 11M Vertical is 1.2 on channel 35, with no tuning on the antenna and no tuner in front of the rig. Caught lightning in the bottle with that setup!
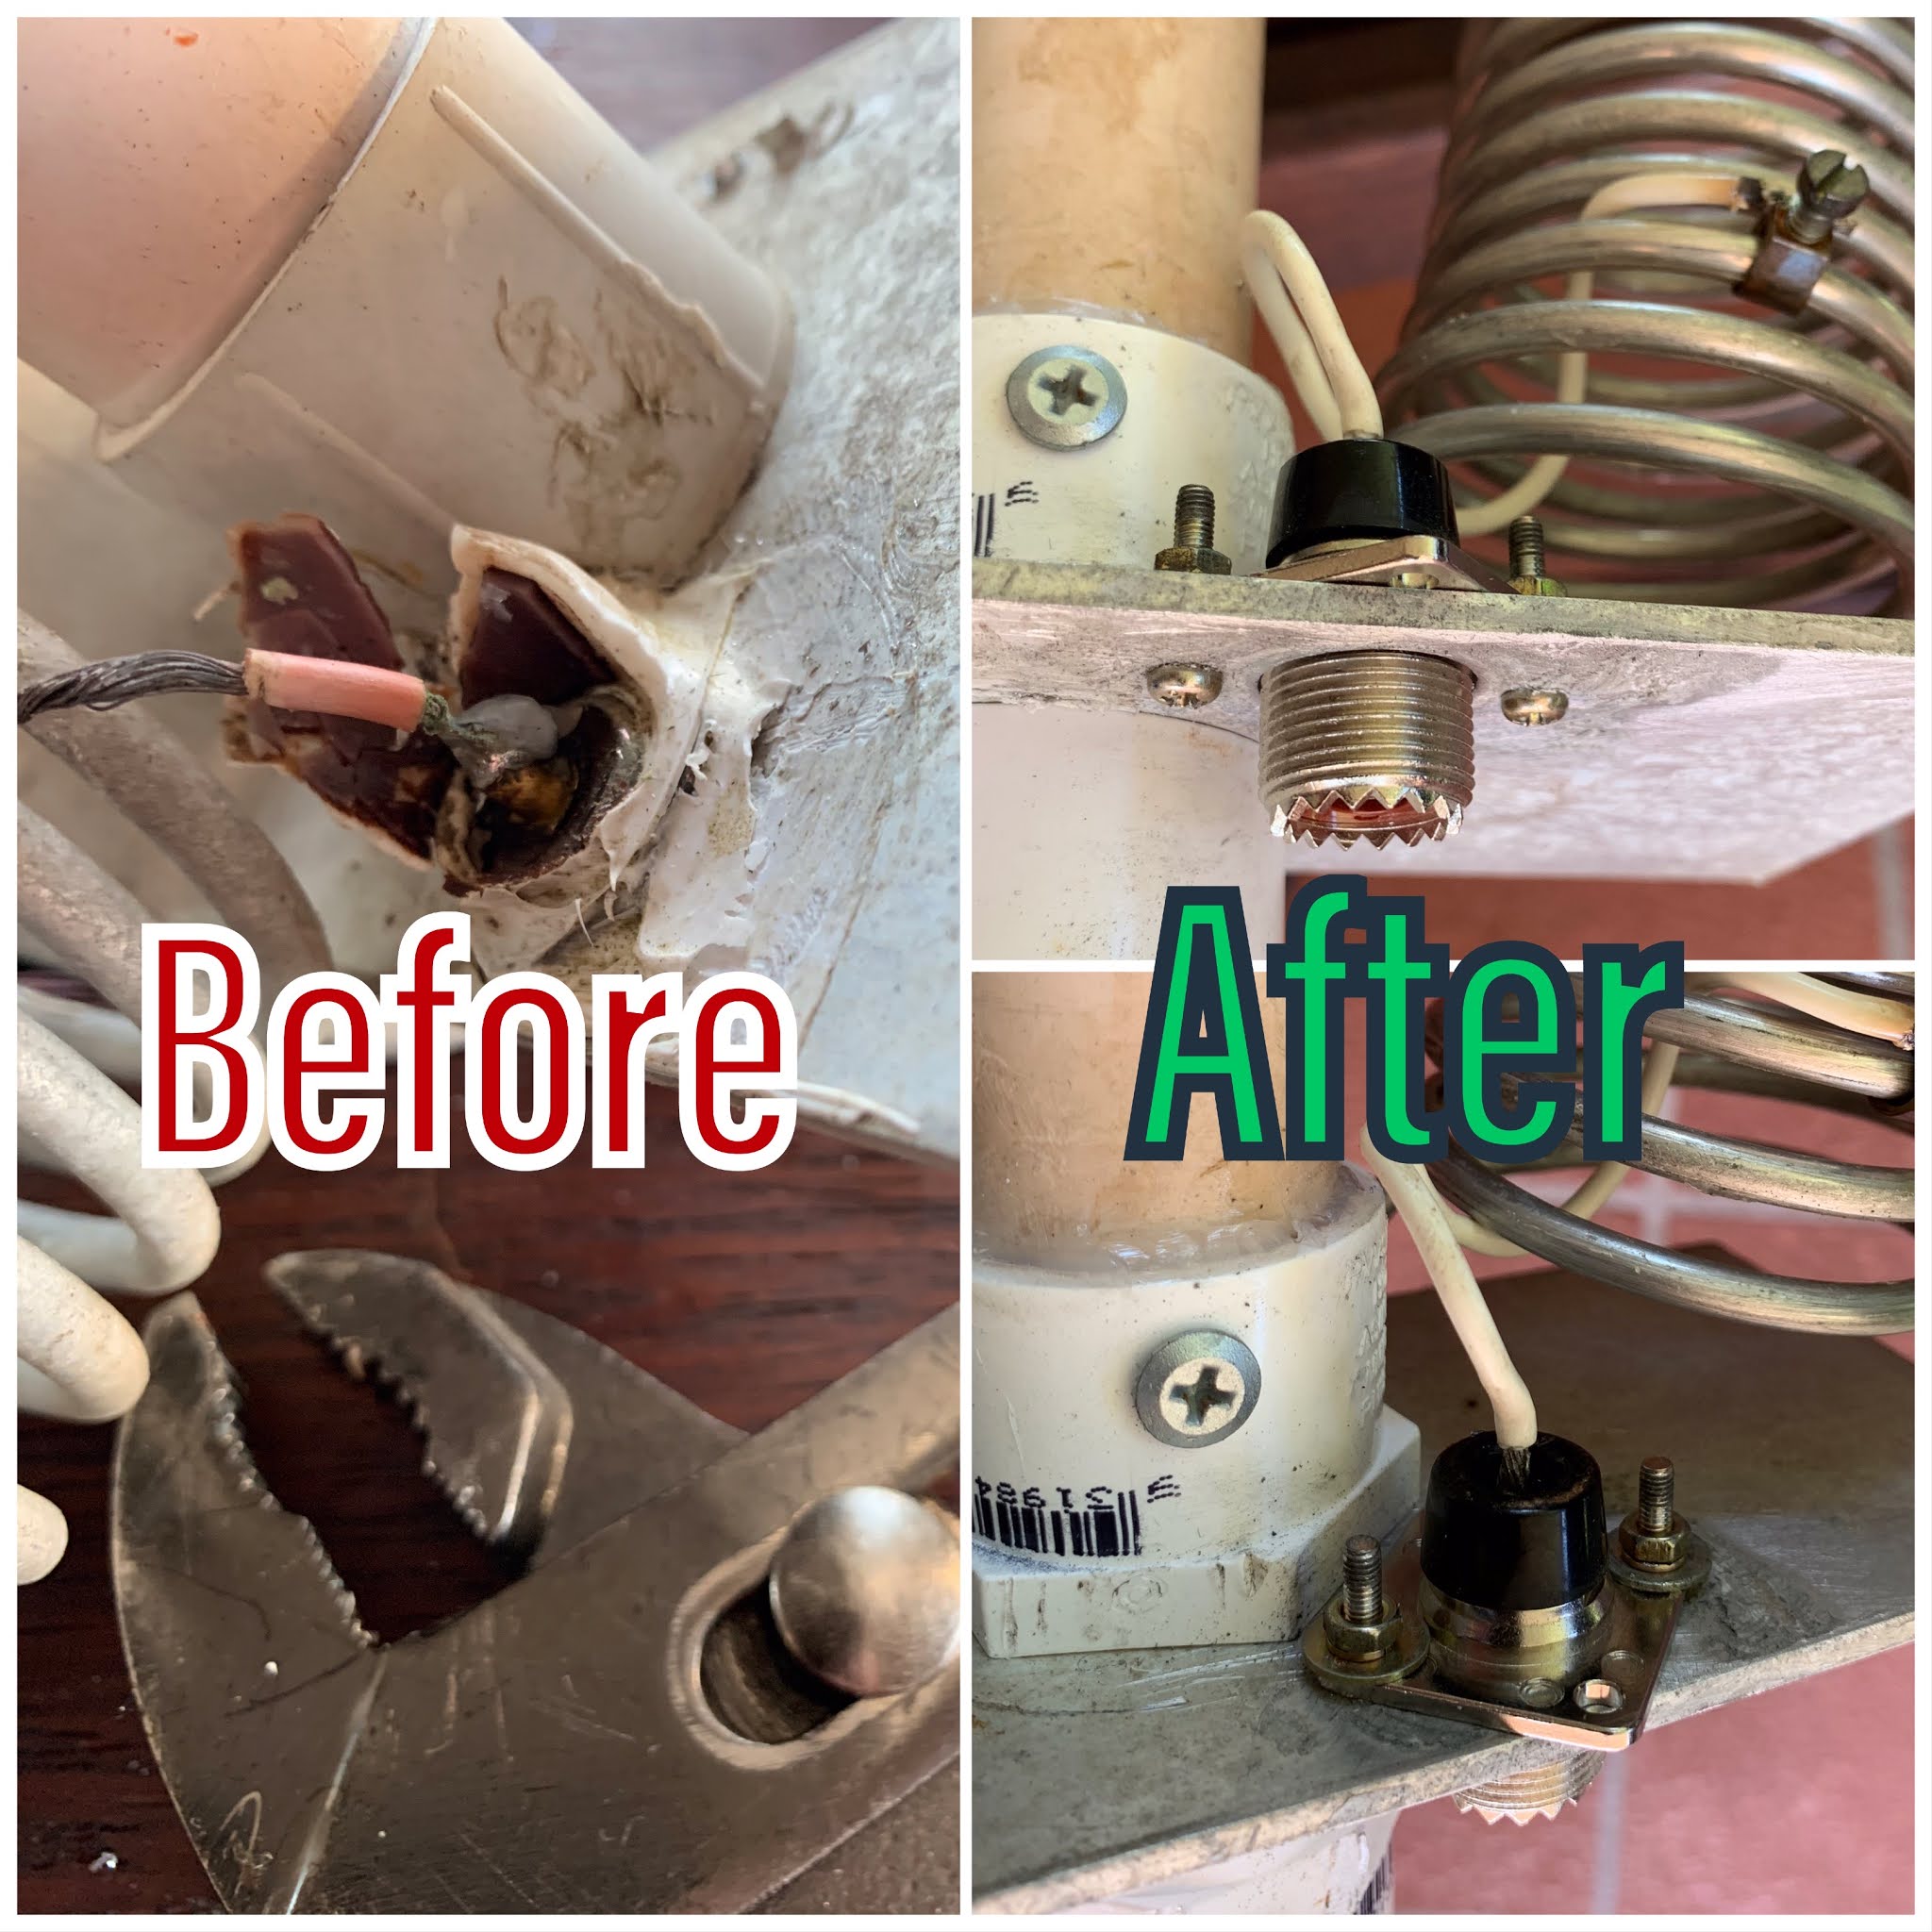
All day in Queensland’s humidity sucks but the outcome was worth it. First 11M vertical was disassembled, tuning coil replaced, connector replaced, and some of the PVC tubing replaced. I think I have the right length but will have to wait to see when I tune it.
Next was making a UHF CB yagi (477 MHz) from scratch. I had the dimensions for a 4 element yagi and just added some extra directors. I’m not sure how this will work but keen to see once I get it up in the air.
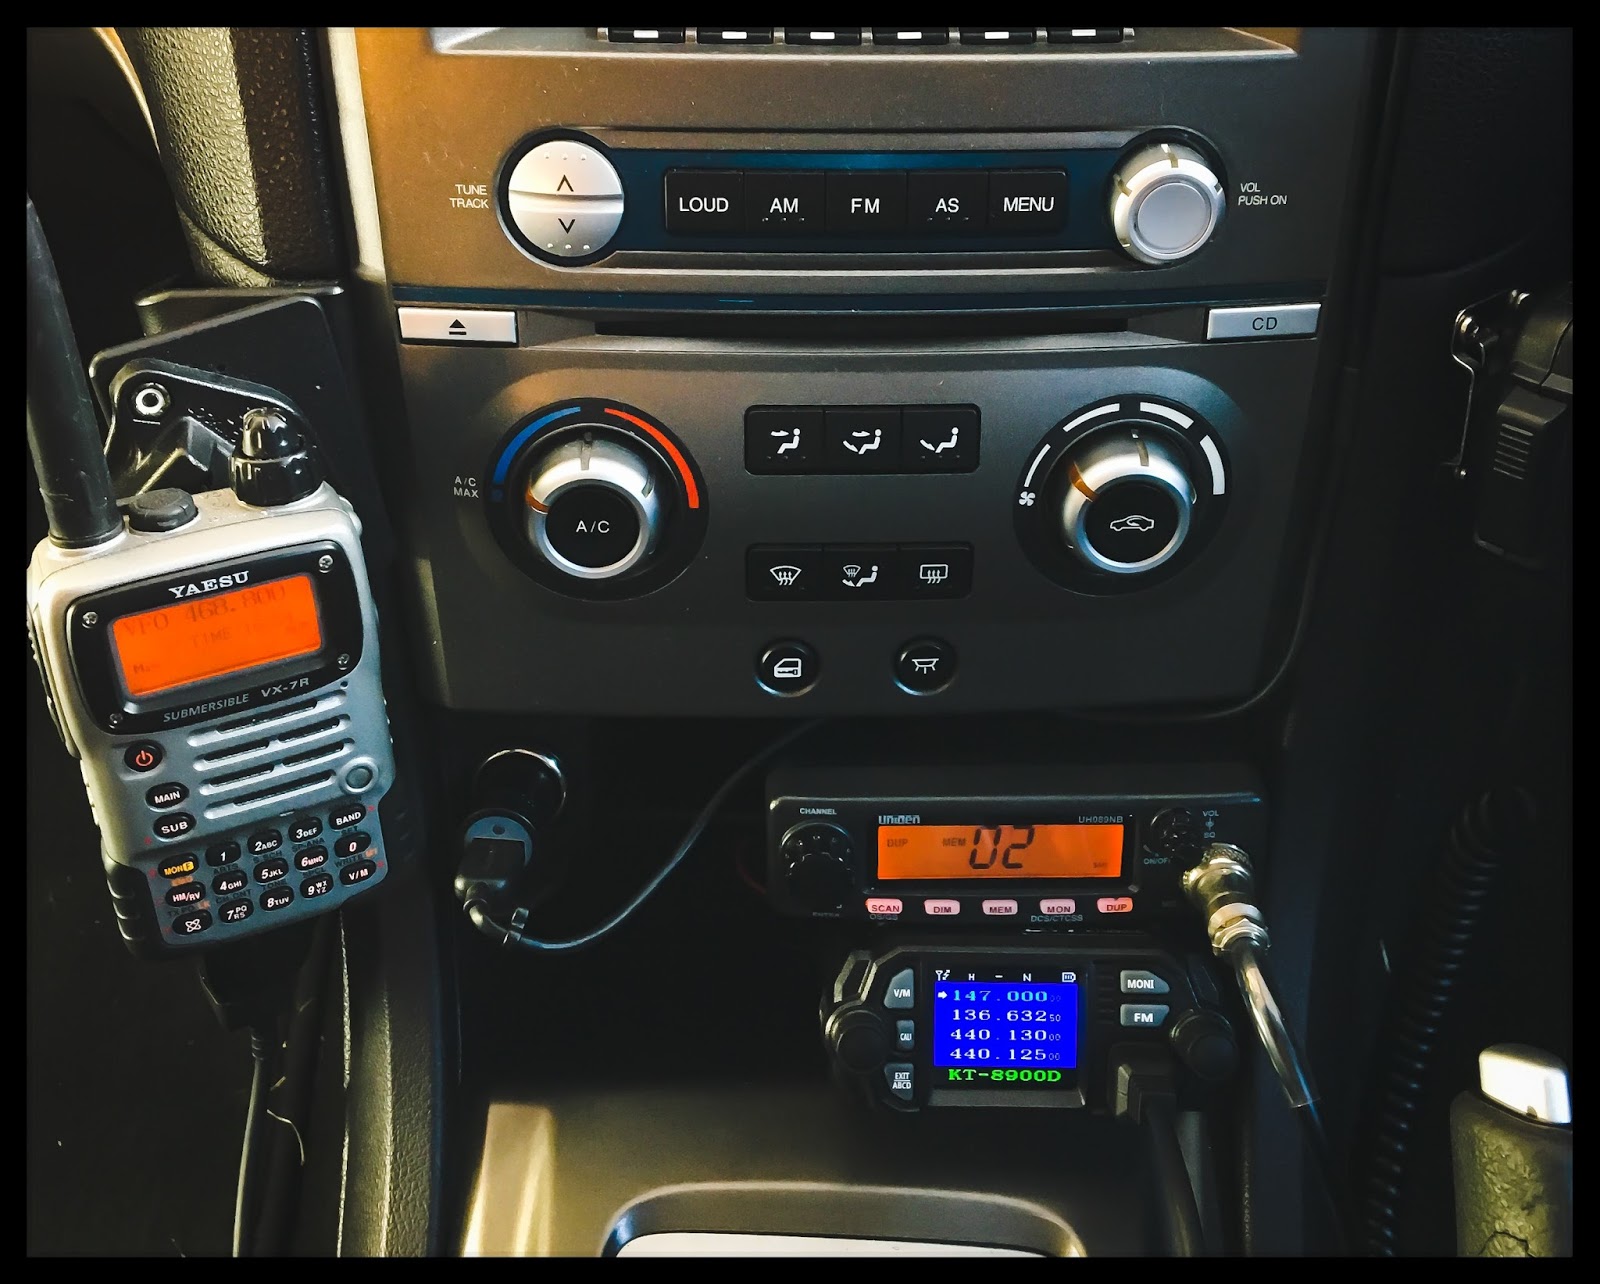
The KT-8900D arrived and I was able to easily mount it in the car. Programming it however seems to be a different story. I manually entered all my local 2M and 70cm repeaters but the radio does not seem to keep the shift and tone on each memory. I'm not sure where I'm going wrong but will keep at it.
Seeing as I just spent nearly $3000 on replacing the gearbox in the mobile money pit I thought it would be a good time to get my radios back into the car - I'm not planning on selling it anytime soon.
Starting with the antennas I am running a Nagoya dualband steel whip for VHF/UHF and an RFI elevated feed whip for UHF CB. The Ford Falcon interior does not have that many flat surfaces to mount radios so I opted to use the centre console as the main spot. With the antennas mounted on the front guards and the cables routed back into the cabin I then started dismantling the dash and centre console to mount the Uniden UH089B UHF CB. It was a mission to not break the stupid plastic clips holding the trim together and in the current heatwave Australia was going through not a very enjoyable experience.
Work in Progress
And with the radio mounted.
The bracket on the left side is the mount for my Yaesu VX7R and the other loose cable is for the GPS. I've just ordered the QYT KT-8900D mini transceiver and expect to slot that in under the Uniden. Hopefully I can make it fit.......
Myself and Dan went to pick up the 10m mast and found it was not one continuous mast, not even 2 pieces, but about 5 seperate sections bodgied together - even had a tyre iron in there to complete the friction coupling. I got a lot of RG213 co-ax, the UHF CB 6DB and 9 DB antennas, the sections of mast and that was it. The antennas have seen better days but I have restored one of them to a working condition which will probably go up on the new mast. Speaking of which I will still need to buy a new mast but can use the sections I got on the weekend as a cross beam.
No new contacts to report but I have made some progress on the 10 metre man-pack/portable. I purchased a Philps TP-92 which was used to set a Philips FM-92 up as a portable unit. I've now put my Dragon on there and started re-fitting a lot of the old and obsolete components. The watt meter has arrived and I'm waiting on the Li-Po battery and regulator to arrive before I commence the wiring.
Latest addition to the station is a new (to me) Alinco DX-70 which has just arrived from the states.
In great condition although I have not had many contacts on it as yet so still no decision on performance. I am 50:50 on whether I prefer the receive on the Kenwood TS-120V.....
To coincide with this my main 10M vertical threw a wobbly and jumped to a SWR of over 10:1 across the board.
I assumed this was the feed line and dropped the antenna for a quick look....not the feedline. Tried to retune, no go. Took a while to notice that the antenna was shorter than usual. One of the screws holding two sections together had sheared and the antenna had telescoped by one section. New screw, retuned and away we go. Well almost. I don't have the same magical tuning with great resonance on 7Mhz and 28Mhz. Such is life.
The EFHWV (http://earchi.org/proj_homebrew.html) is up and running and it is a cool antenna. All set up for portable operation as a sloper with my 7 metre squid pole. I'm thinking of running one of these at the shack as a permanent if I can work out how to string it up with the vertical height I have. Speaking of portable I have dismantled my Dragon SS485H manpack.
I'm looking to rebuild something a little smaller and more self contained. Lighter more efficient batteries are on the cards as well as SLA batteries are just too heavy. Get this one sorted and some SOTA activations could take place.
I'm also picking up a 10 metre mast on Saturday and chopping it down to be a 6-7 metre mast with 3 metre boom. 1 pole = more antennas on it. I'm not decided on what to put up there yet but the UHF CB dipole I'm running is giving me poor performance so a vertical may be the go....luckily the pole comes with a 6DB and a 9DB vertical, only snag is I have to dismantle it as well.....still, the price is right. Gold Coast Amateur Radio Society (http://www.gcars.com.au/)had their annual hamfest yesterday and despite my best intentions I couldn't make it. Have to be next year.
My new high-viz housing for the Motorola XTS3000 arrived today and I was straight into it.
Not a complicated task by any means but maybe a few tricks.....
You don't really need the special Motorola tool to get the housing off unless you are truly hamfisted. I used 2 flat blade precision screwdrivers and a circlips pliers with an angled attachment.
Just pop the two screwdrivers in between the radios metal body and the housing and gently angle them outwards till the tabs are visbile and free.
Using the circlips pliers in the other hand I gently prised the radio from the housing. Just be gentle and your case should not crack. Disconnect the radio from the controls connector that is inside the housing - just pulls off (but not by the ribbon cable).
Get the other housing ready, make sure the rubber gasket running around the radio is properly in place, you have reconnected the ribbon cable from the new housing to the radio, the keypad is in?
I forgot this one and had to pull it apart again. You can see the ribbon cable in the old housing above. Angle the radio in at the top and ensure it is seated up as far as it goes and then gently push the rest of the radio into the base. Watch out for the little switch board on the side of the radio foulding the radio chassis and also make sure the gasket doesn't sneak off as it goes in.
Check everything works.
....and this is the final product with the newer UHF/GPS antenna on board.
....and with the rest of the family to give a sense of scale (Alinco DJ-G5, Moto XTS3000, Moto Saber II)
There's a bit more detail on the disassembly from "Snarlingrabiddog5150" on Youtube who goes chasing an encryption board inside his XTS3000. Some of his other videos are also very informative if you check out his youtube channel.